How to turn images into videos with AI
You have hundreds of product photos, team headshots, and marketing images sitting in a folder doing nothing.
What if each one could become a video in under 60 seconds?
That is not a hypothetical. AI image-to-video generators have gotten ridiculously good in 2026. You upload a photo, type a short prompt, and get back a video with natural motion, camera pans, and realistic animation.
I tested over a dozen tools this year. Some are free. Some are worth paying for. Most fall somewhere in between.
Here is everything you need to know about turning your images into videos with AI, including the tools that actually work, the ones that waste your time, and the workflows that get the best results. Image-to-video is one of seven content repurposing methods we cover in our guide to repurposing content with AI video.
Why image-to-video matters right now
The image-to-video AI market hit $2.8 billion in 2026, according to Vivideo. That number is growing fast because the technology solves a real problem.
You already have the visual assets. Photos from product shoots. Screenshots from your app. Headshots of your team. Event photos. Stock images you licensed.
These are static. They sit on a webpage or in a social post and get scrolled past.
Video stops the scroll.
Short-form AI videos generate 2.7x more engagement than static image posts, according to the same Vivideo research. That is not a marginal improvement. That is the difference between a post getting 200 impressions and one getting 540.
The shift is clear. 87% of creative professionals now use AI tools for video creation, with 66% using them weekly. If you are still posting static images in 2026, you are leaving engagement on the table.
How AI image-to-video actually works
The process is simpler than you think.
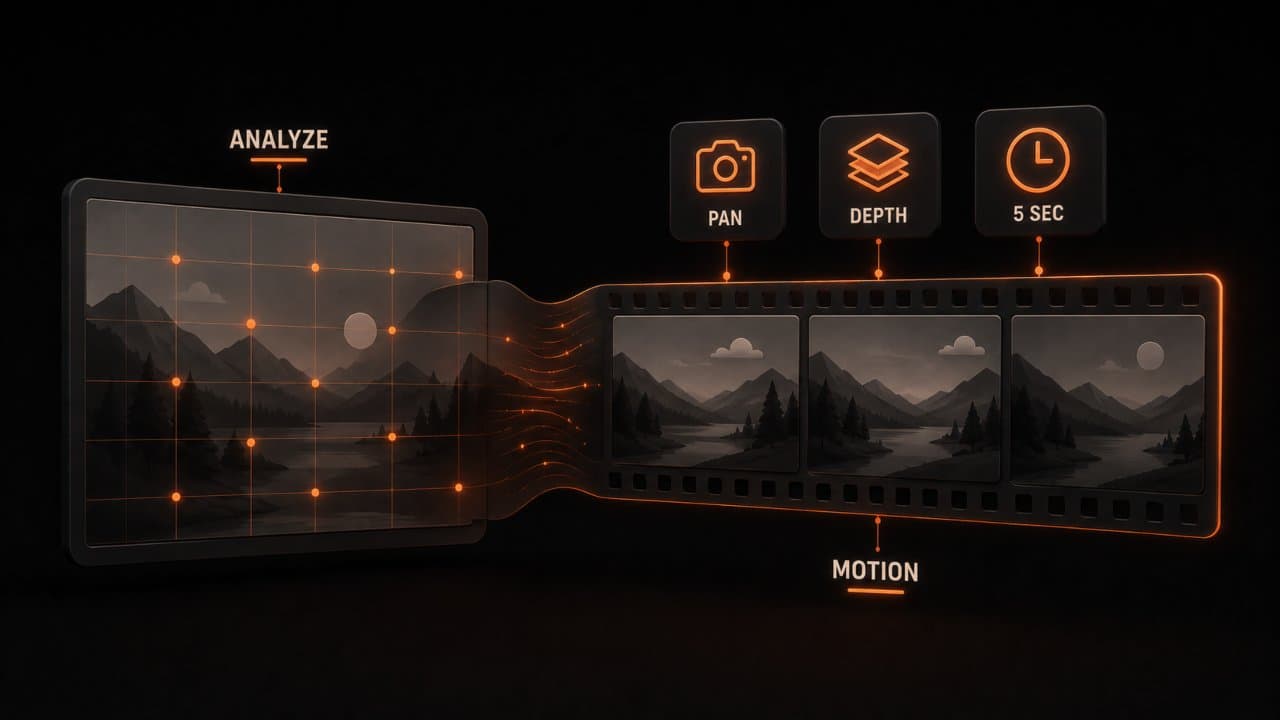
You upload an image. The AI analyzes the composition, depth, subjects, and context. It generates motion based on what it "sees" in the image.
A landscape photo gets a slow pan and parallax effect. A product shot gets a gentle rotation or zoom. A portrait gets subtle head movement and blinking.
The AI is not adding random motion. It is interpreting the image and applying motion that makes visual sense.
Most tools give you control over the type of motion. You can specify camera movements (pan left, zoom in, orbit), the duration (3 seconds to 10 seconds), and the style (cinematic, smooth, dynamic).
Some tools go further. They let you write a text prompt describing what should happen: "The person turns their head and smiles" or "The camera slowly pulls back to reveal the full scene."
The output is typically a 3-10 second video clip at 720p or 1080p resolution. Higher-end tools output 4K.
Processing time ranges from 30 seconds to 5 minutes depending on the tool and the complexity of the motion.
The best free AI image-to-video generators in 2026
I tested the free tiers of every major tool. Here is what actually works without paying.
Google Veo (via Gemini)
Google's Veo 3.1 is the most capable free option right now. You get 3 free video generations per day through Gemini.
The quality is strong. Motion looks natural. The AI handles complex scenes well, including multiple subjects and detailed backgrounds.
The limitation is the daily cap. Three videos per day is fine for testing. It is not enough for production.
Vivideo
Vivideo is the best truly free image-to-video tool I found. No watermarks. No credit card required. Multiple animation styles.
The motion is smooth and the output quality is solid. It handles product photos and portraits particularly well.
The free tier has some output limitations, but for someone just getting started, this is where I would begin.
Runway (free tier)
Runway offers a limited free plan that lets you test their Gen-3 Alpha model. The quality is among the best in the industry.
The free tier gives you a small number of credits. You will burn through them fast. But the output quality justifies upgrading if image-to-video is a core part of your workflow.
Kling AI
Kling AI produces the most natural-looking movement for portrait-to-video conversions. If you are turning headshots or team photos into video, start here.
The free tier is generous enough to test thoroughly before committing.
Paid tools worth the investment
If you are producing video regularly, free tools will not cut it. Here are the paid options that deliver consistent quality.
DeepReel
DeepReel is built for turning existing content into video at scale. It is not just an image-to-video tool. It handles full articles, PDFs, and presentations too. See our guides on converting blogs to video and converting PDFs to video for those workflows.
Pricing starts at $5/month for 10 videos, $25/month for 100 videos, or $30/month for unlimited. That makes it the most affordable option for volume production.
Where DeepReel stands out is the workflow. You are not just animating a single image. You are building complete video content from your existing assets. Upload your photos, add text, choose a voice, and get a finished video ready for distribution.
For teams that need to produce 20+ videos per month, the economics are hard to beat.
Runway (paid plans)
Runway's Gen-3 Alpha model sets the quality standard for image-to-video. The motion is cinematic. The AI understands depth, lighting, and physics in ways other tools do not.
Paid plans start at $12/month. For creative professionals who need the absolute best output quality, Runway justifies the price.
Pika
Pika focuses on short-form video creation. Its image-to-video feature produces punchy, social-media-ready clips.
The tool is particularly good at adding dramatic motion to product shots. If you are running an ecommerce brand and want to turn product photos into ads, Pika is worth testing.
Luma Dream Machine
Luma produces smooth, high-quality video from still images. It handles complex scenes well and offers good control over camera movement.
The AI is especially strong with architectural and landscape images. Real estate teams and travel brands get great results here.
Step-by-step: Your first image-to-video workflow
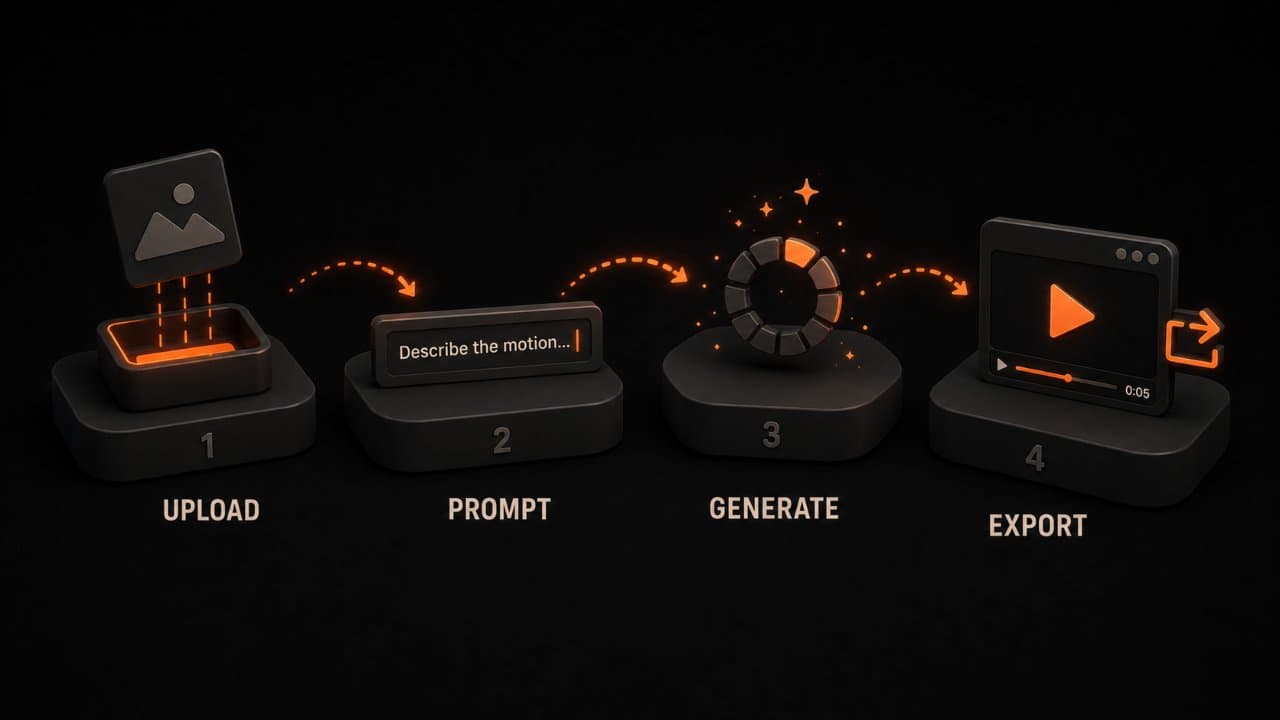
Here is exactly how to go from a static image to a finished video in under 5 minutes.
Step 1: Choose the right image
Not every image converts well to video. The best source images have these qualities:
High resolution (at least 1080p). Clear subject. Good depth with foreground and background elements. Natural lighting. Minimal text overlays.
Images that struggle: low-resolution screenshots, heavily edited graphics with flat design, images with lots of text, collages with multiple distinct frames.
Step 2: Write a clear prompt
Most tools accept a text prompt that guides the motion. Be specific. (For more on writing effective prompts, our guide on the best AI video prompts for content creators covers what works and what doesn't.)
Bad prompt: "Make this look cool."
Good prompt: "Slow zoom into the product. Subtle camera shake. Warm lighting glow. 5 seconds."
Better prompt: "Camera orbits the product from left to right. Background stays slightly blurred. Product catches a light reflection at the 2-second mark."
The more specific your prompt, the better your output. Describe the camera movement, the timing, and any lighting changes you want.
Step 3: Generate and review
Hit generate. Wait 30 seconds to 3 minutes.
Watch the output. Ask these questions:
Does the motion look natural? Is the subject distorted or warped? Does the camera movement match what you described? Is the pacing right for your platform?
If something looks off, adjust your prompt and regenerate. Most tools let you regenerate with tweaked settings without starting over.
Step 4: Export and distribute
Export at the highest resolution available. For social media, 1080x1080 (square) or 1080x1920 (vertical) works best. For YouTube or website embeds, 1920x1080 (landscape).
Add your video to your content calendar. One image can generate 3-5 different video variations for different platforms by changing the aspect ratio, duration, and motion style.
Five workflows that get real results
Workflow 1: Product photos to social ads
Take your product photography. Generate 5-second videos with slow zoom and subtle rotation. Add text overlays in your editing tool. Run as paid social ads.
AI video ads have an average view-through rate of 62%, compared to 47% for traditional ads, according to Vivideo. That 15-point gap is significant when you are paying per impression. For more on this approach, our guide on creating video ads with AI covers the full ad creation workflow.
Workflow 2: Team headshots to "Meet the team" videos
Upload team headshots. Generate subtle animation (natural head movement, blinking). String them together with name cards and background music. Post to your careers page and LinkedIn.
This turns a boring "About Us" page into an engaging video in 15 minutes. If you want to take it further with custom AI avatars from those headshots, our guide to AI avatar video generators covers the options.
Workflow 3: Real estate photos to listing tours
Take listing photos. Generate videos with slow pans and room-to-room transitions. Add voiceover describing the property. Publish on YouTube and Zillow.
Listings with video get 403% more inquiries than those without, according to the National Association of Realtors. We cover real estate video tactics in more detail in our AI video for real estate agents guide.
Workflow 4: Blog header images to social clips
Take the header image from your latest blog post. Generate a 3-second animated version. Add the article title as a text overlay. Post on Instagram and TikTok with a link to the full article.
This drives traffic back to your blog without creating new content from scratch.
Workflow 5: Event photos to recap videos
Take photos from your latest event, conference, or webinar. Generate short animated clips from each. Edit them together into a 30-60 second recap video. Share across all channels.
This extends the life of your event content by weeks.
The technical details that matter
Not all AI image-to-video is created equal. The underlying technology determines what the tool can and cannot do.
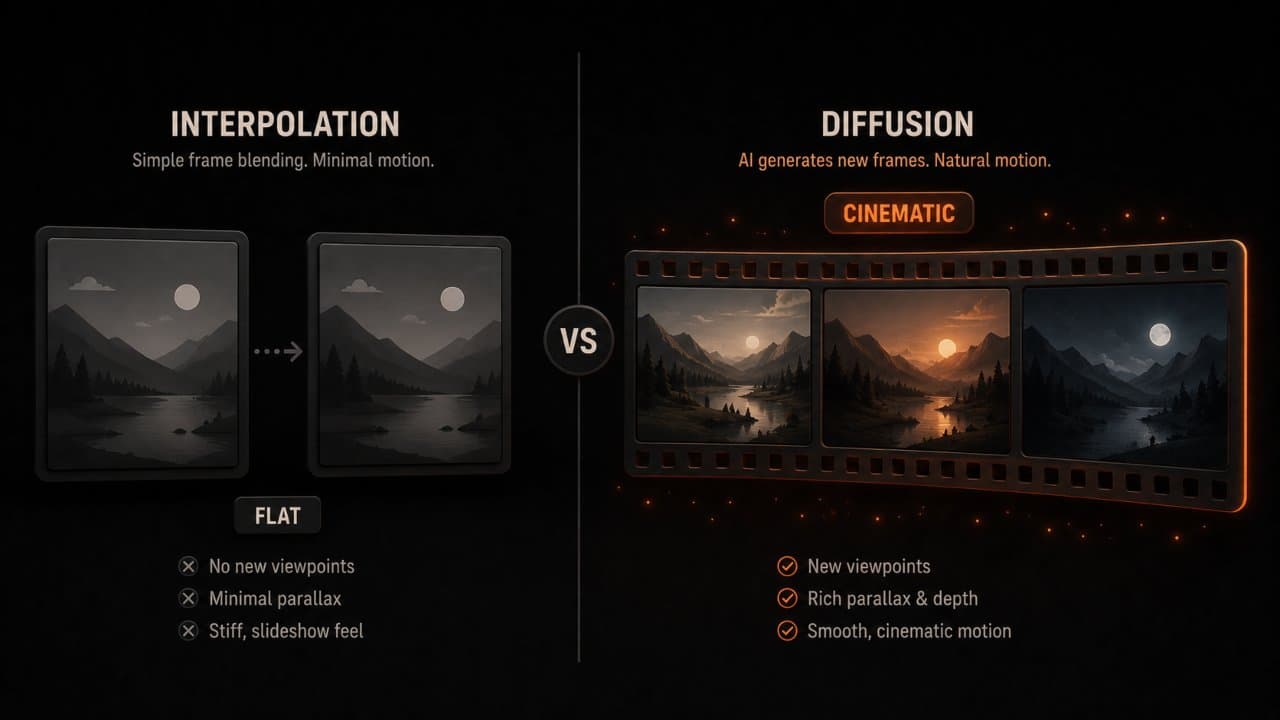
Motion models vs. interpolation
Cheap tools use frame interpolation. They take your image, create a slightly modified copy, and blend between the two. The result looks like a slow Ken Burns effect. Fine for slideshows. Not impressive for social media.
Better tools use diffusion-based motion models. These AI systems generate entirely new frames that depict natural movement, physics, and lighting changes. The difference is obvious when you see them side by side.
Runway's Gen-3 Alpha and Google's Veo 3.1 use diffusion models. That is why their output looks cinematic while budget tools look like animated PowerPoint slides.
Resolution and frame rate
Most free tools output at 720p and 24fps. Paid tools typically offer 1080p at 30fps. Top-tier tools produce 4K at 60fps.
For social media, 1080p at 30fps is the sweet spot. Anything higher than that gets compressed by the platform anyway. For website embeds or presentations, higher resolution matters.
Consistency across multiple generations
If you are producing a series of videos from multiple images (like a product line or team page), you want consistent style across all of them.
Some tools let you save style presets. Others have batch processing modes that apply the same motion parameters across all images. DeepReel handles this well because it is designed for batch content production.
Consistency is where most free tools fall short. Each generation looks different. For one-off social posts, that is fine. For branded content, you need control.
Common mistakes and how to avoid them
Mistake 1: Using low-resolution source images
The AI cannot add detail that is not there. Start with the highest resolution image available. Upscale before converting if needed.
Mistake 2: Expecting long videos from a single image
AI image-to-video works best for 3-10 second clips. Trying to stretch a single image into a 30-second video usually creates weird artifacts and unnatural looping.
For longer videos, combine multiple image-to-video clips in a timeline editor.
Mistake 3: Over-prompting
Simple motion often looks better than complex instructions. "Slow zoom in" usually beats "dramatic flying camera orbit with explosions." Start simple. Add complexity only if needed.
Mistake 4: Ignoring aspect ratios
Generate your video in the aspect ratio you need for the final platform. Converting after the fact crops your composition and can ruin the framing.
Mistake 5: Not batch processing
If you have 50 product photos, do not convert them one at a time. Use a tool like DeepReel that handles batch processing. Upload all 50. Set your motion preferences. Generate them all. Review and select the best.
Choosing the right image-to-video AI tool for your use case
There is no single "best" tool. The right choice depends on what you are doing.
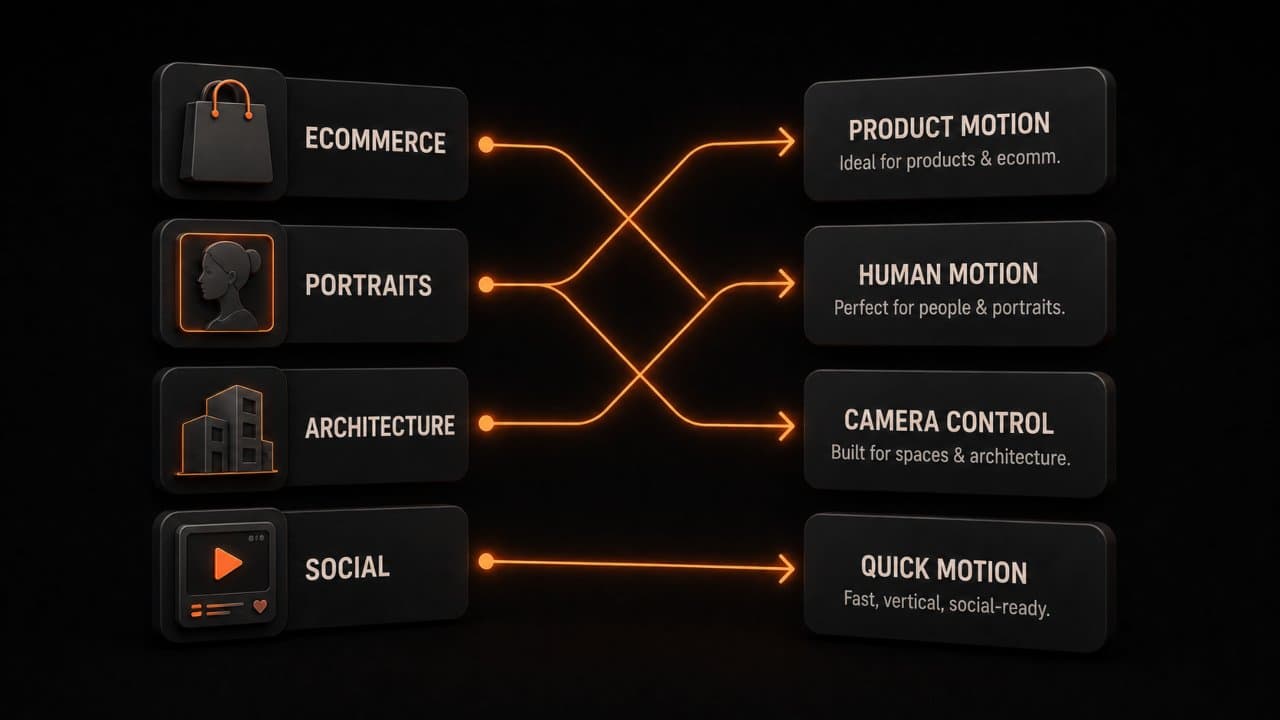
For product photography and ecommerce: Pika or DeepReel. Both handle product shots well and offer batch processing.
For portraits and headshots: Kling AI produces the most natural facial motion. HeyGen is great if you also need lip-sync and speaking avatars.
For landscapes and architecture: Luma Dream Machine excels here. The parallax and depth effects look cinematic.
For social media content at scale: DeepReel or Vivideo. Both are built for volume production at a reasonable price.
For maximum quality on individual clips: Runway Gen-3 Alpha. It is the quality leader, but the credits add up fast if you are producing at scale.
FAQ
How long does it take to generate a video from an image?
Most tools take 30 seconds to 3 minutes per clip, depending on the resolution, duration, and complexity. Batch processing takes longer but runs in the background. You can generate 50 clips overnight with most tools.
Can I use AI-generated video commercially?
Yes, with most tools. Check the specific terms of service. DeepReel, Runway, Pika, and Vivideo all allow commercial use of generated content on their paid plans. Free tier terms vary.
What image formats work best?
PNG and high-quality JPEG work best. Avoid compressed images, screenshots with compression artifacts, or images smaller than 1024x1024 pixels. The higher the input quality, the better the output.
Wrap up
You already have the images. Product photos, team headshots, event photos, blog graphics. Every one of those is a video waiting to happen.
Pick one tool from this guide. Upload your best image. Generate your first video. You will have it in under 60 seconds. For a full content-to-video pipeline that handles images, articles, PDFs, and more, start with DeepReel at $5/month. If you also have written content to convert, our article-to-video guide for news publishers and PDF-to-video guide cover those formats.